Leave Applications
Let employees apply for leave from their phone, have a manager approve or refuse it, and keep a dated record of every request.
This guide rebuilds the Fair Work Ombudsman's leave application form in Canyou: the same leave types, the same leave dates and the same manager approval section, with no paper to chase.
For what's on the Fair Work form, when you can refuse leave and what records you need to keep, see our guide to the Fair Work leave application form.
What you'll use
- Form tasks for the request and the approval
- Workflow steps so the manager's approval unlocks after the employee submits
- A Notification task to tell the employee their request has been reviewed
- Self-service workflows so employees can apply whenever they need
- Completion notifications to tell payroll when a request is decided
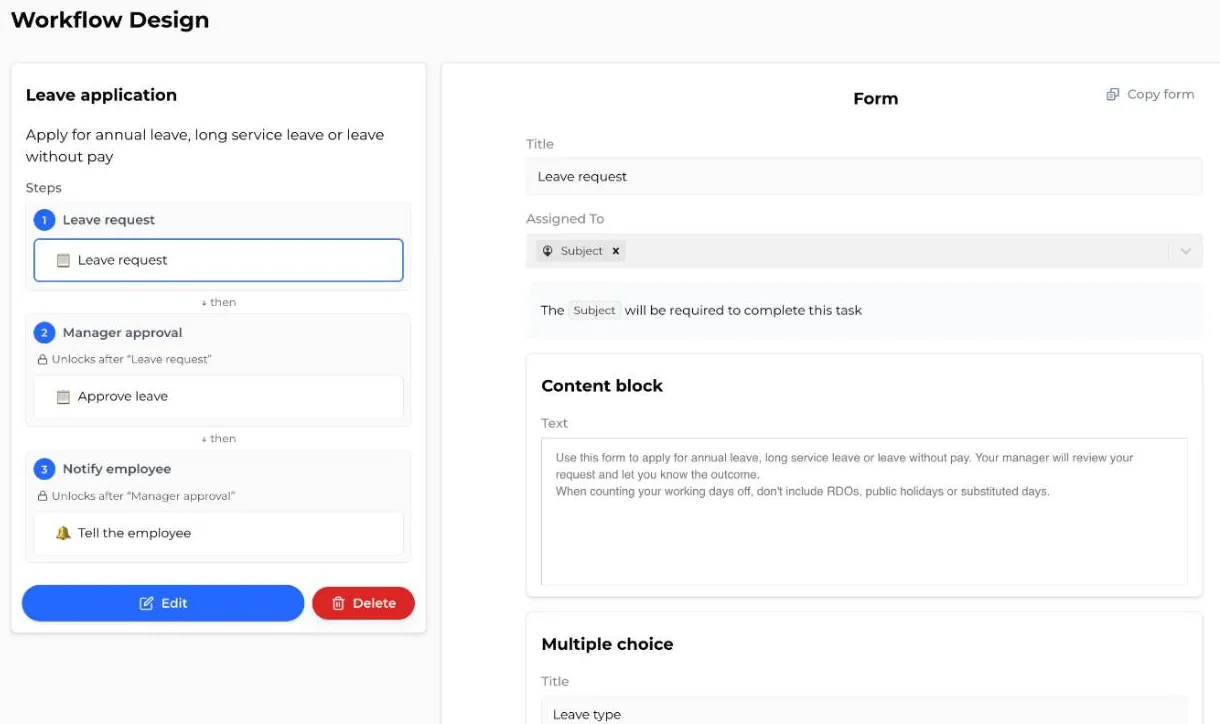
The finished workflow has three steps:
Step 1 - Create the workflow
Go to the Workflows menu, click Create, and name the workflow "Leave application". Add a short description, for example "Apply for annual leave, long service leave or leave without pay". Employees see it when they start a workflow.
Click the Step 1 name and rename it "Leave request".
Full guide: Create a workflow
Step 2 - Build the leave request form
In the "Leave request" step, click Add task and select Form. Name it "Leave request" and leave Assigned To as Subject, so the person who starts the workflow fills it in.
Add these sections, in this order.
1. An explanation
Click Add section and select Content block. For example:
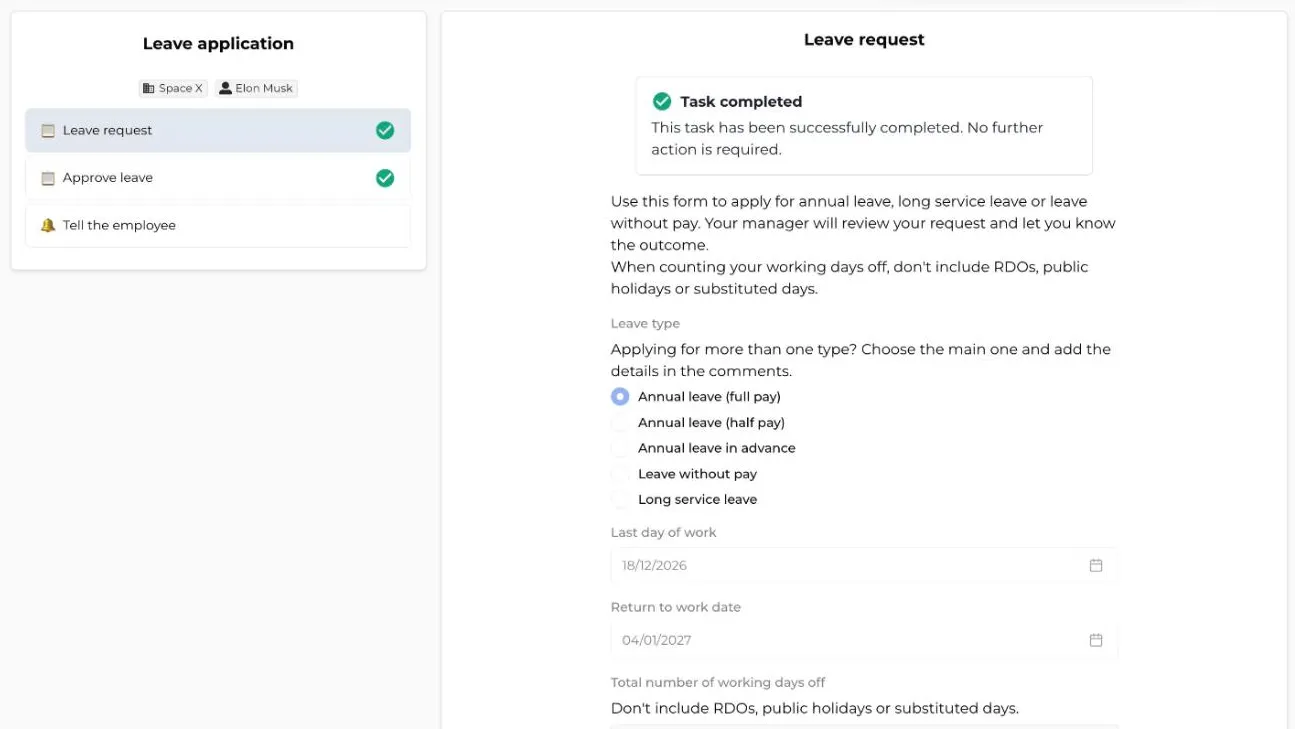
Use this form to apply for annual leave, long service leave or leave without pay. Your manager will review your request and let you know the outcome.
When counting your working days off, don't include RDOs, public holidays or substituted days.
2. The questions
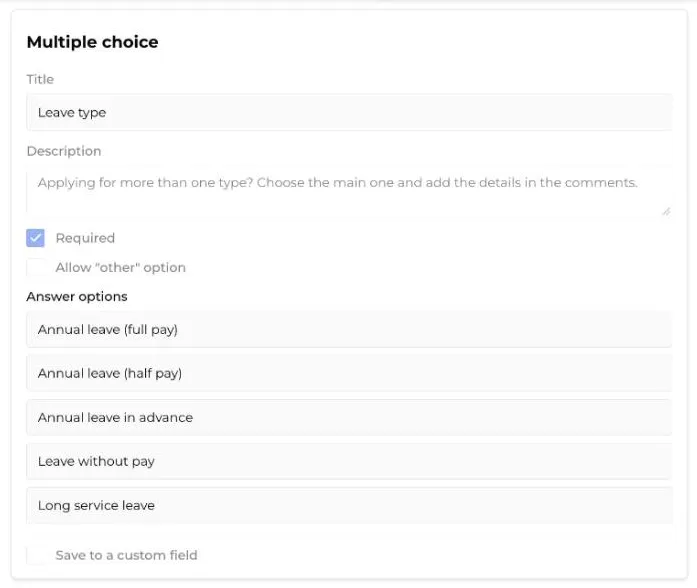
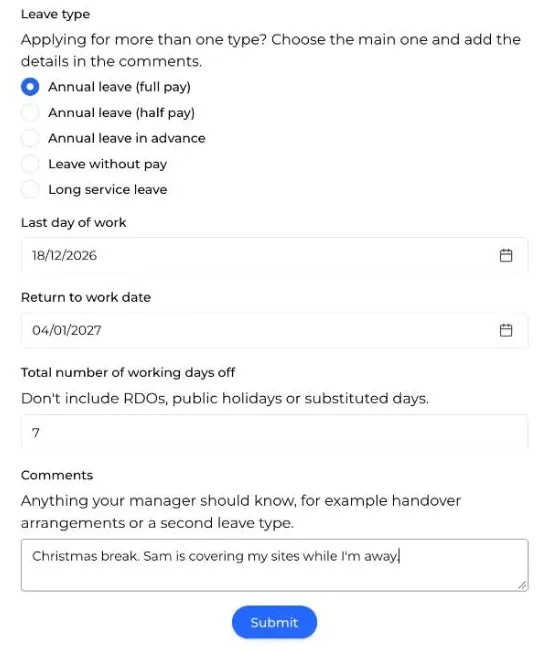
- Leave type (Multiple choice, Required) - Annual leave (full pay), Annual leave (half pay), Annual leave in advance, Leave without pay, Long service leave. These match the Fair Work form. Add other types, such as personal/carer's leave, if your business wants one form for everything.
- Last day of work (Date question, Required)
- Return to work date (Date question, Required)
- Total number of working days off (Number question, Required) - add the description "Don't include RDOs, public holidays or substituted days."
- Comments (Text question, Answer size Paragraph) - for handover arrangements or a second leave type.
You don't need first name, surname or position questions. Canyou already knows who submitted the form.
Step 3 - Add the manager approval
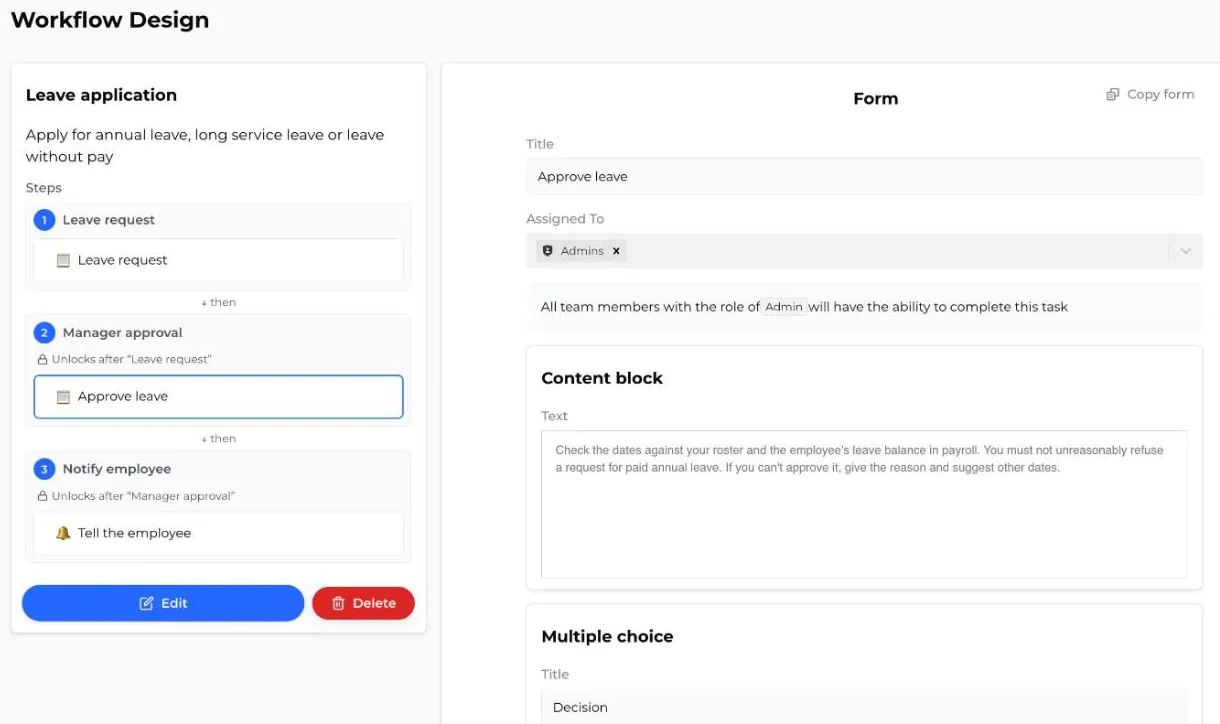
Click Add step and rename the new step "Manager approval". It shows Unlocks after "Leave request", so the approval only opens once the employee has submitted.
In the new step, click Add task, select Form and name it "Approve leave". In Assigned To, remove Subject and choose who approves leave:
- Admins - any admin can approve
- a position, for example Operations Manager
- a specific member
Add these sections:
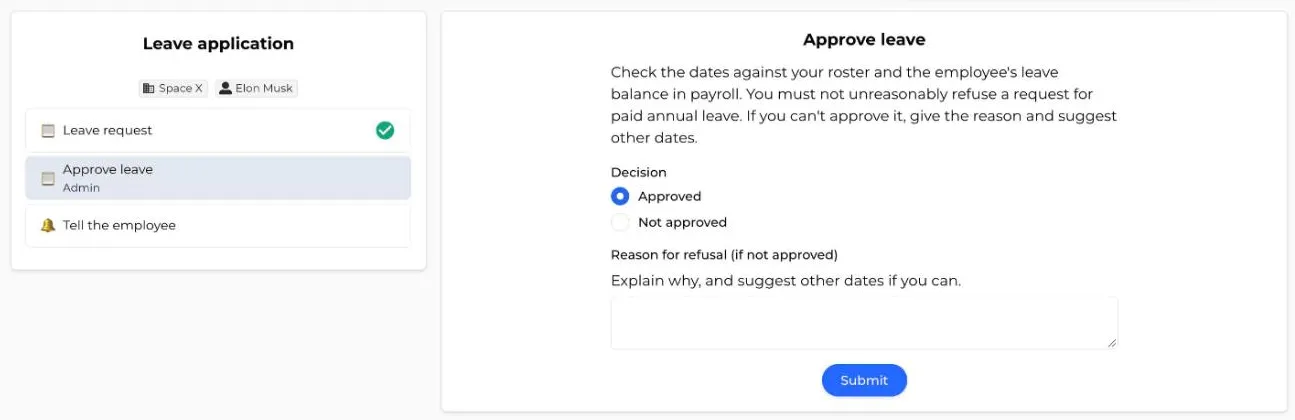
- Content block - a reminder for the approver, for example "Check the dates against your roster and the employee's leave balance in payroll. You must not unreasonably refuse a request for paid annual leave. If you can't approve it, give the reason and suggest other dates."
- Decision (Multiple choice, Required) - Approved, Not approved
- Reason for refusal (if not approved) (Text question, Answer size Paragraph)
Step 4 - Tell the employee
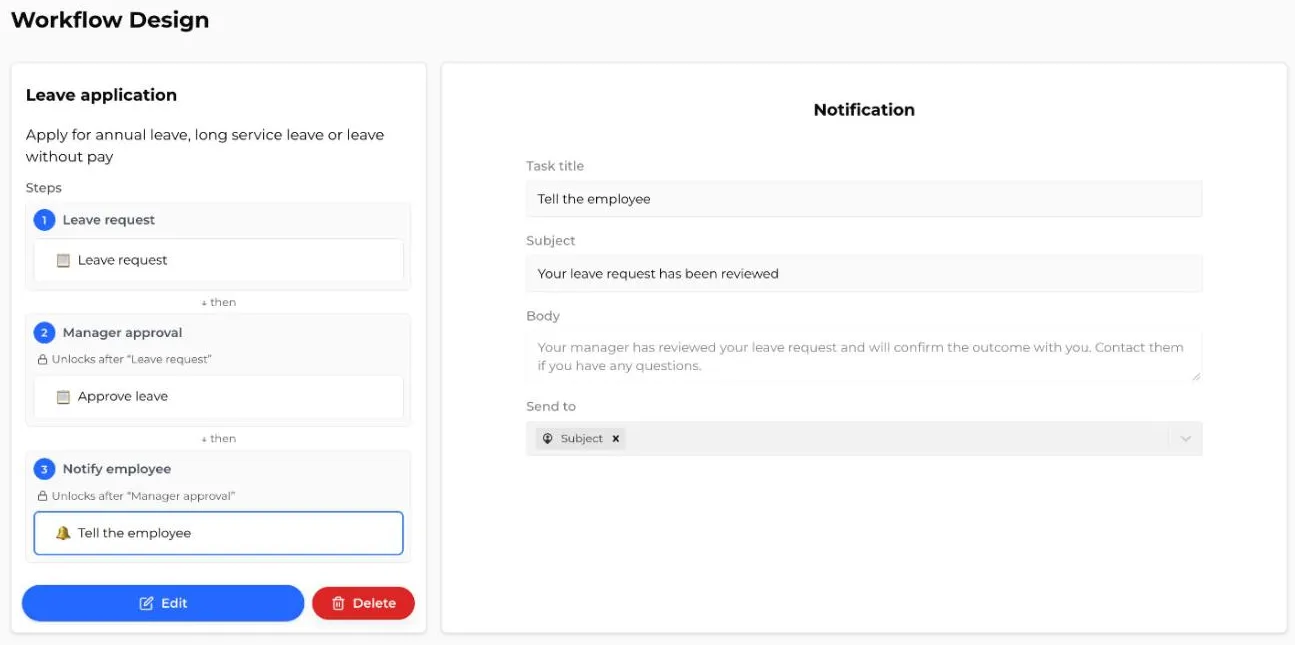
Click Add step and rename it "Notify employee". Click Add task and select Notification. Give it a Subject and Body, for example:
- Subject: Your leave request has been reviewed
- Body: Your manager has reviewed your leave request and will confirm the outcome with you. Contact them if you have any questions.
In Send to, remove Admins and select Subject. The notification goes to the employee automatically as soon as the approval is submitted.
The notification doesn't include the decision, so the approver still lets the employee know whether it was approved, and the reason if it wasn't.
Click Save.
Step 5 - Make it self-service
On the Workflows page, open the workflow's 3 dot menu and click Make self-service, then confirm.
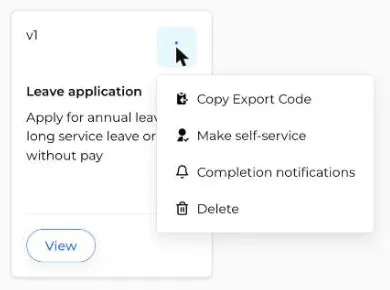
Employees can now click Start workflow on their dashboard and pick Leave application whenever they need leave, so you don't have to assign it.
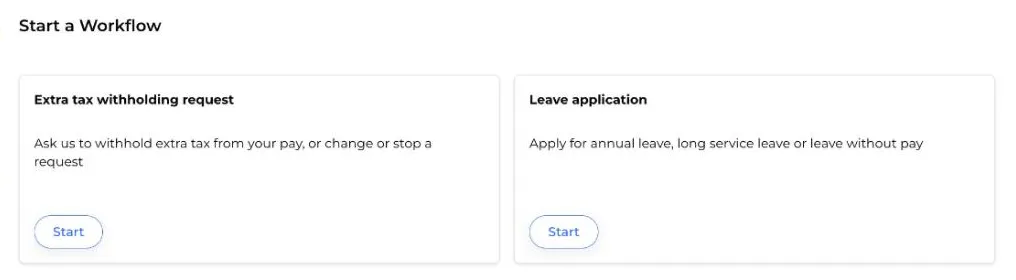
Full guides: Create a self service workflow, Start a self service workflow
Step 6 - Notify payroll
Open the workflow's 3 dot menu and select Completion notifications. Toggle Notifications on, add your payroll officer, bookkeeper or the Admins group in the Notify field, and click Save.
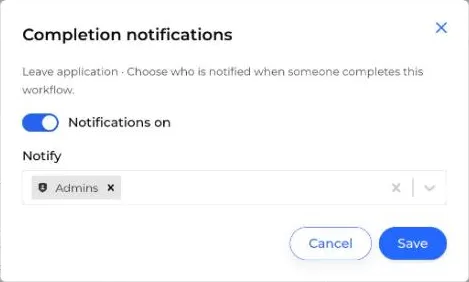
The workflow completes as soon as the manager has made a decision and the employee's notification has gone, so payroll hears about every approved or refused request straight away.
Full guide: Completion notifications
How it works day to day
- The employee applies. They start Leave application from their dashboard, choose the leave type, enter their dates and the number of working days, and submit.
- The manager decides. The "Approve leave" task unlocks for the approver. They check the dates against the roster and the employee's balance, choose Approved or Not approved, add a reason if it's refused, and submit.
-
Everyone's told. The employee gets the notification, and payroll gets the completion notification.
-
Payroll records the leave. Enter the approved leave in your payroll software, such as Xero, so the employee's leave balance is updated. Canyou keeps the request and the decision, but leave balances stay in payroll.
Both forms stay against the employee with the date they were completed. That's your record of what was asked for and what was decided.
Good to know
- Refusing paid annual leave. Under the National Employment Standards you must not unreasonably refuse a request to take paid annual leave. Always record the reason in the approval form.
- Annual leave in advance. Many awards require a written agreement, signed by both of you, for leave taken in advance. Set it up with Annual leave in advance agreements.
- Changing the form later. Changes to the workflow only apply to requests started after you save. Requests already in progress keep the version they started with.