Help Centre
Getting Started
Dashboard
How to guides
Workflows
Workflow templates
Tasks
E-Sign
Positions
Custom Fields
Reminders
Automations
Entry Points
Users
Certifications
Videos
Businesses
Logging In
Superannuation
Xero Integration
Deputy Integration
Visa Checks
Billing
FAQs

Create a position

The next step in the getting started guide is to create a Position.

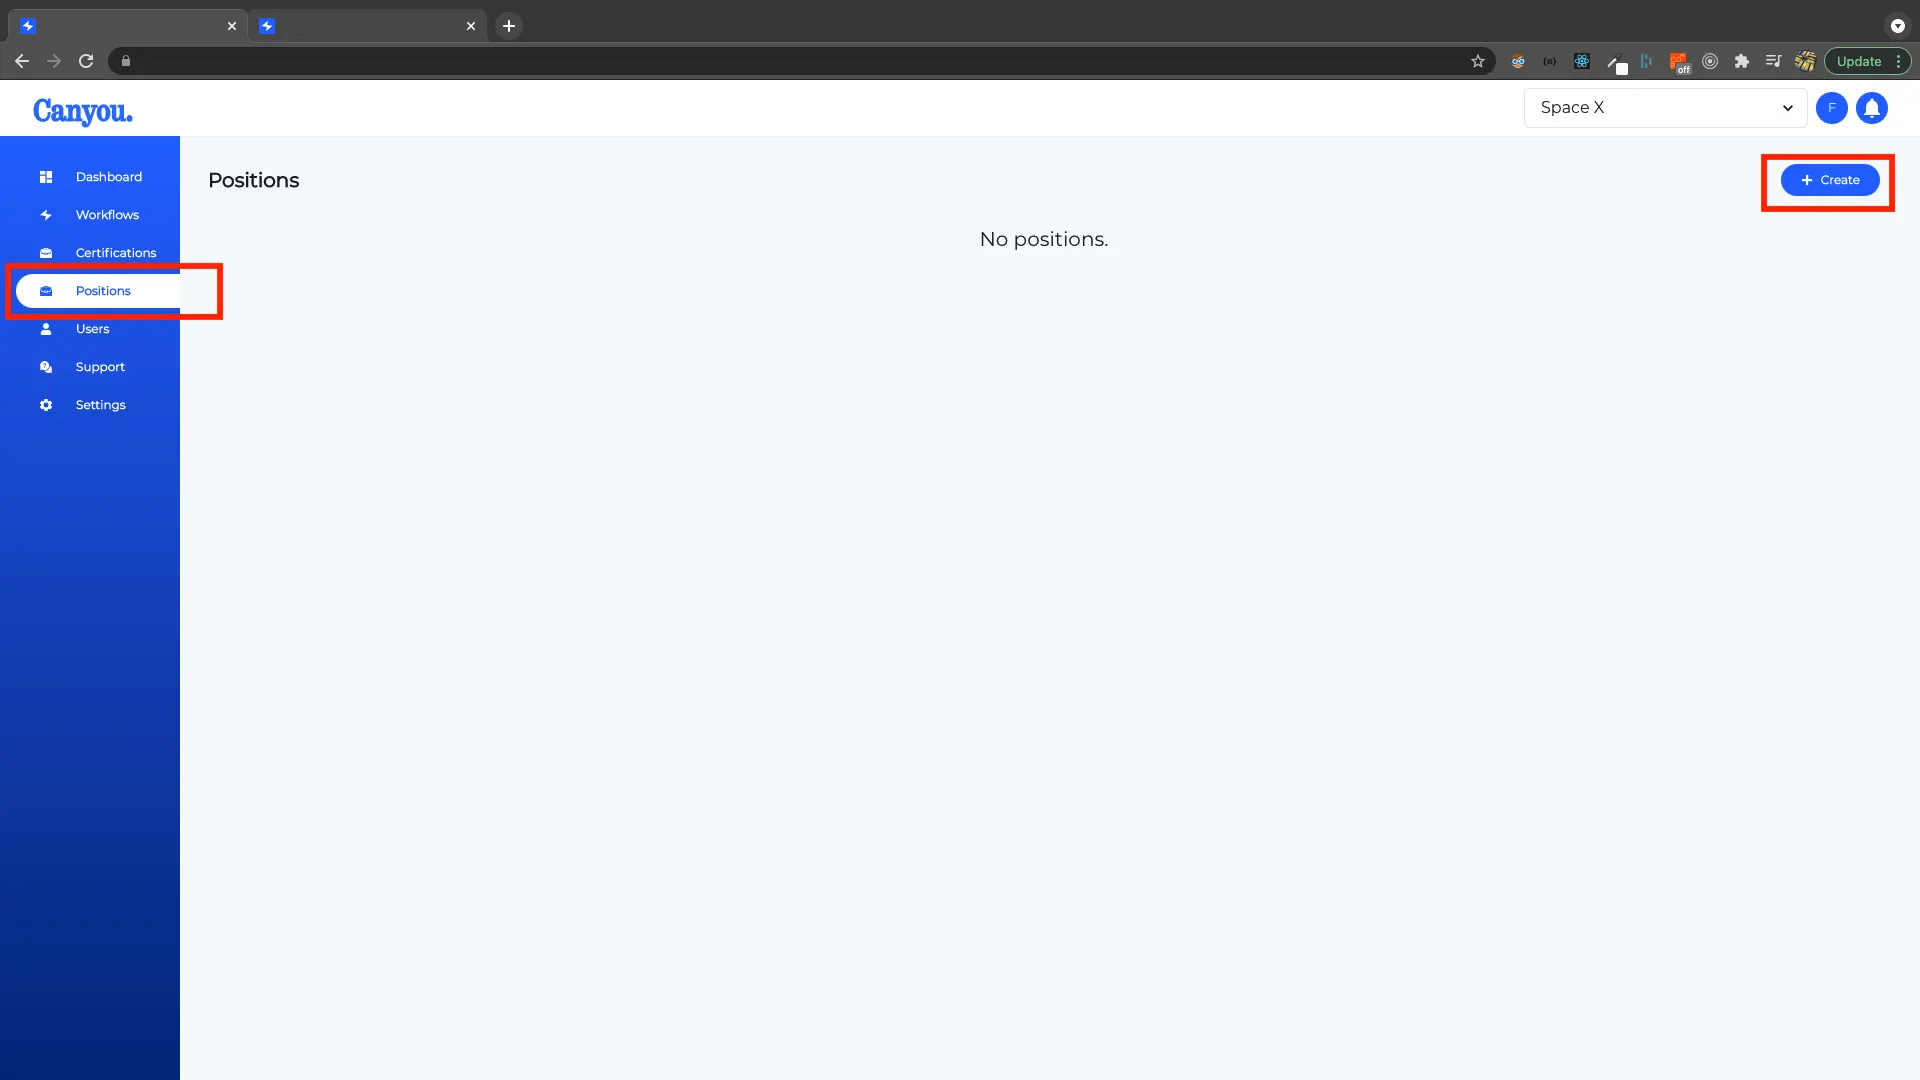
  1. Navigate to the position menu and click the Create button.
screenshot
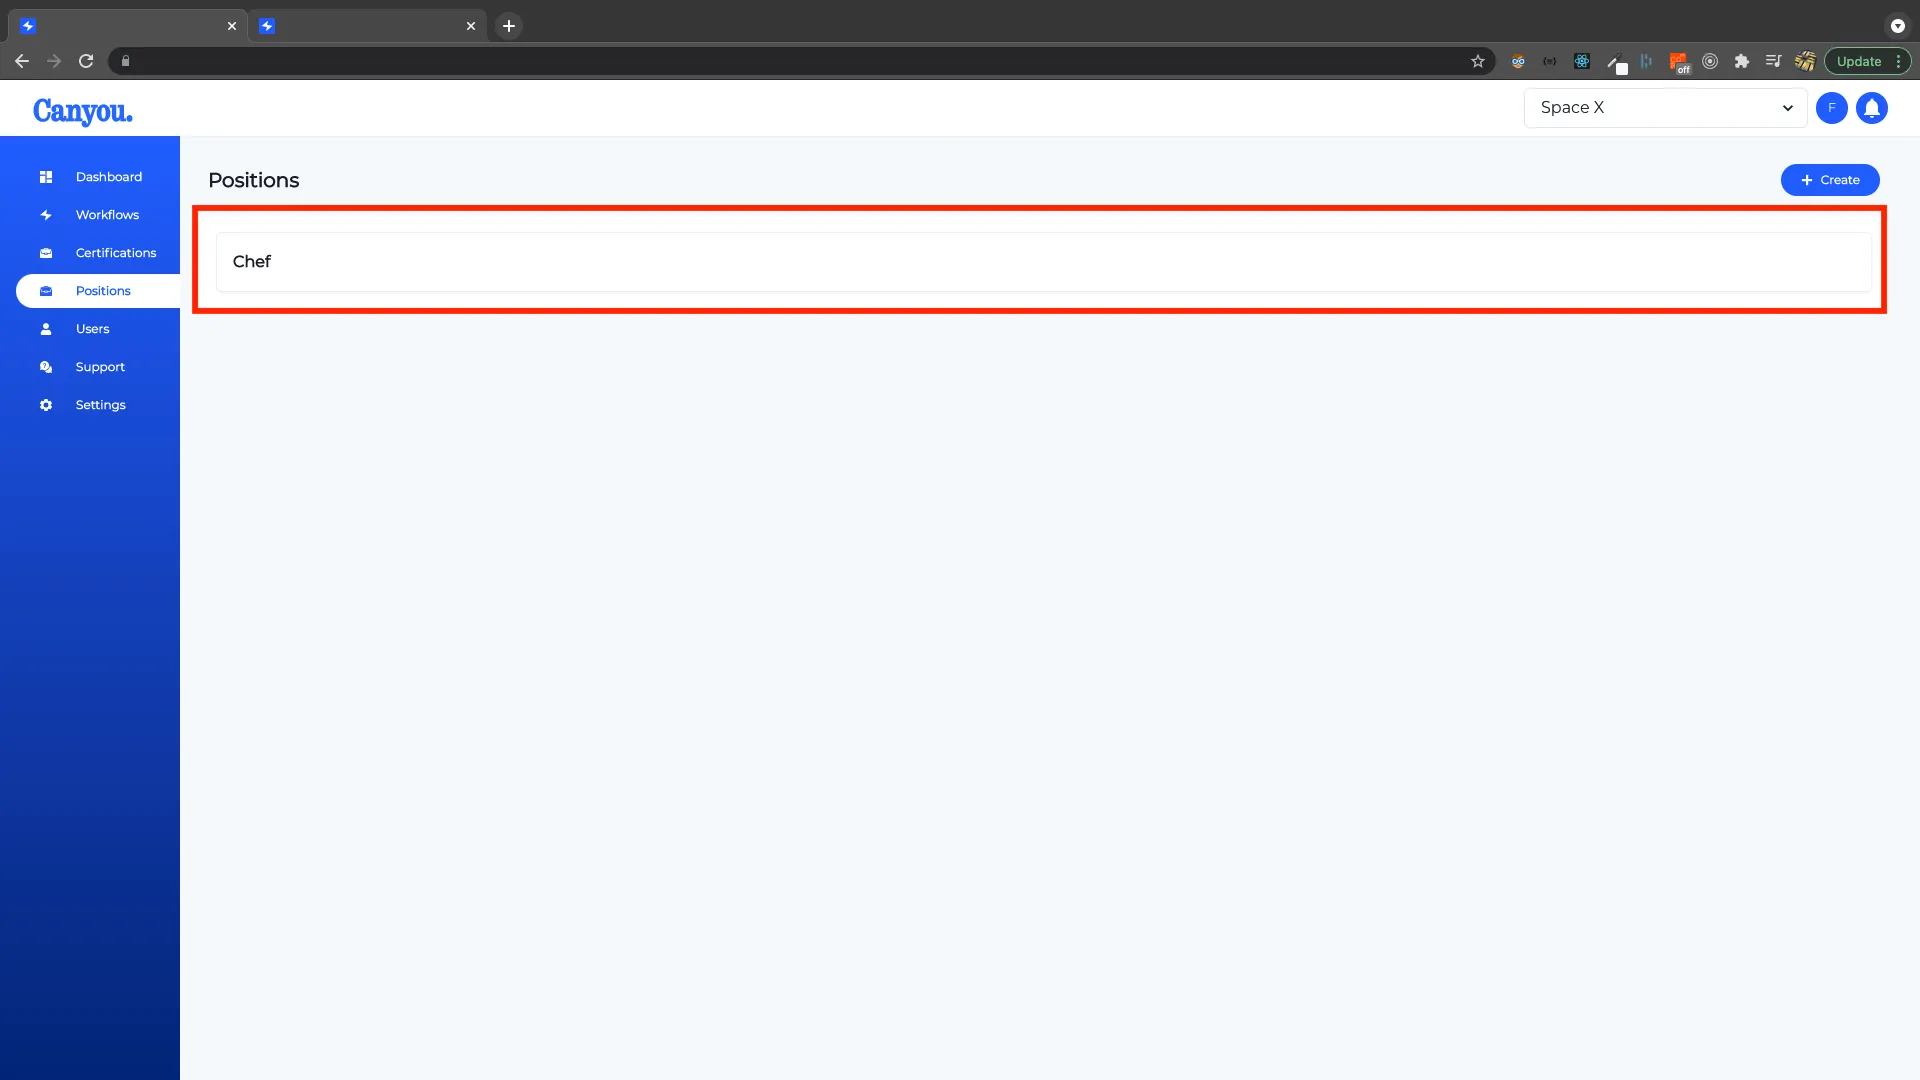
  1. Give the position a name in this example we use Chef. Then click on the position.
screenshot
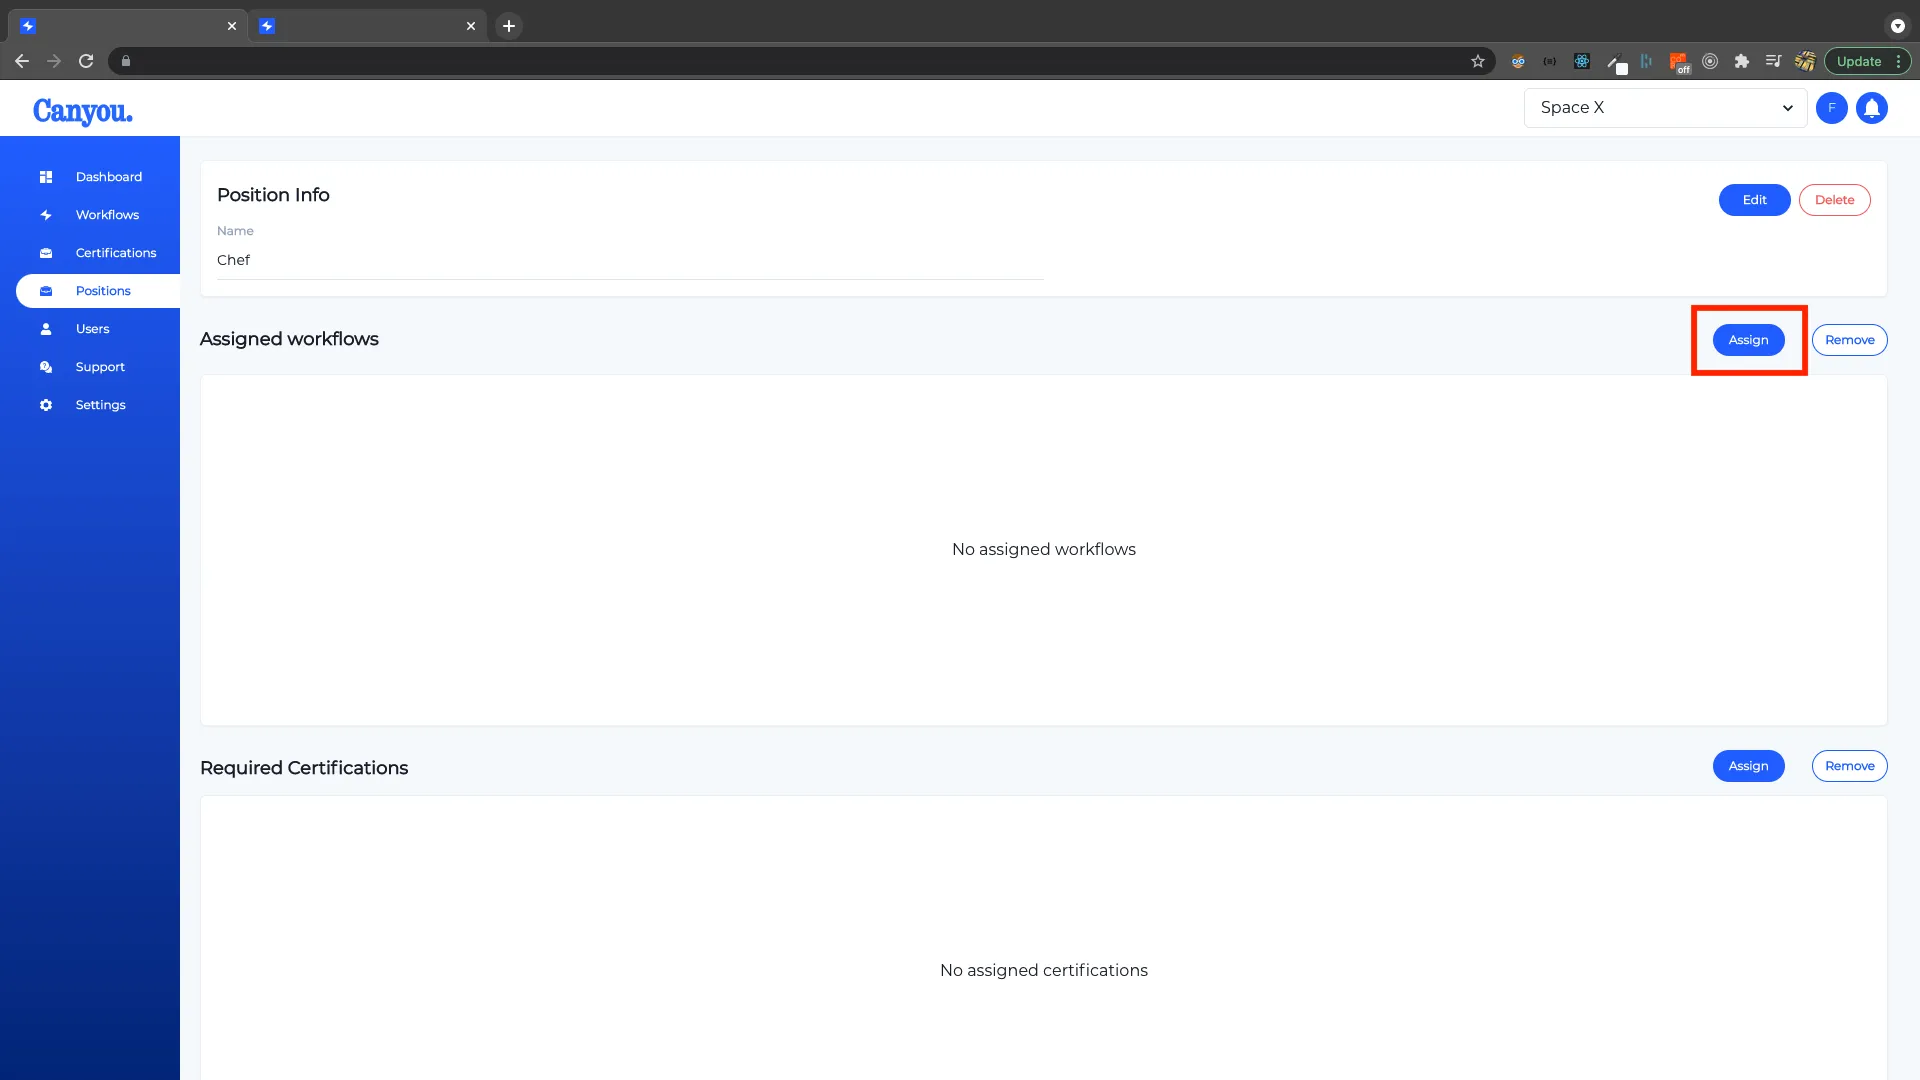
  1. Click the Assign button. This is where we assign the Workflows.
screenshot
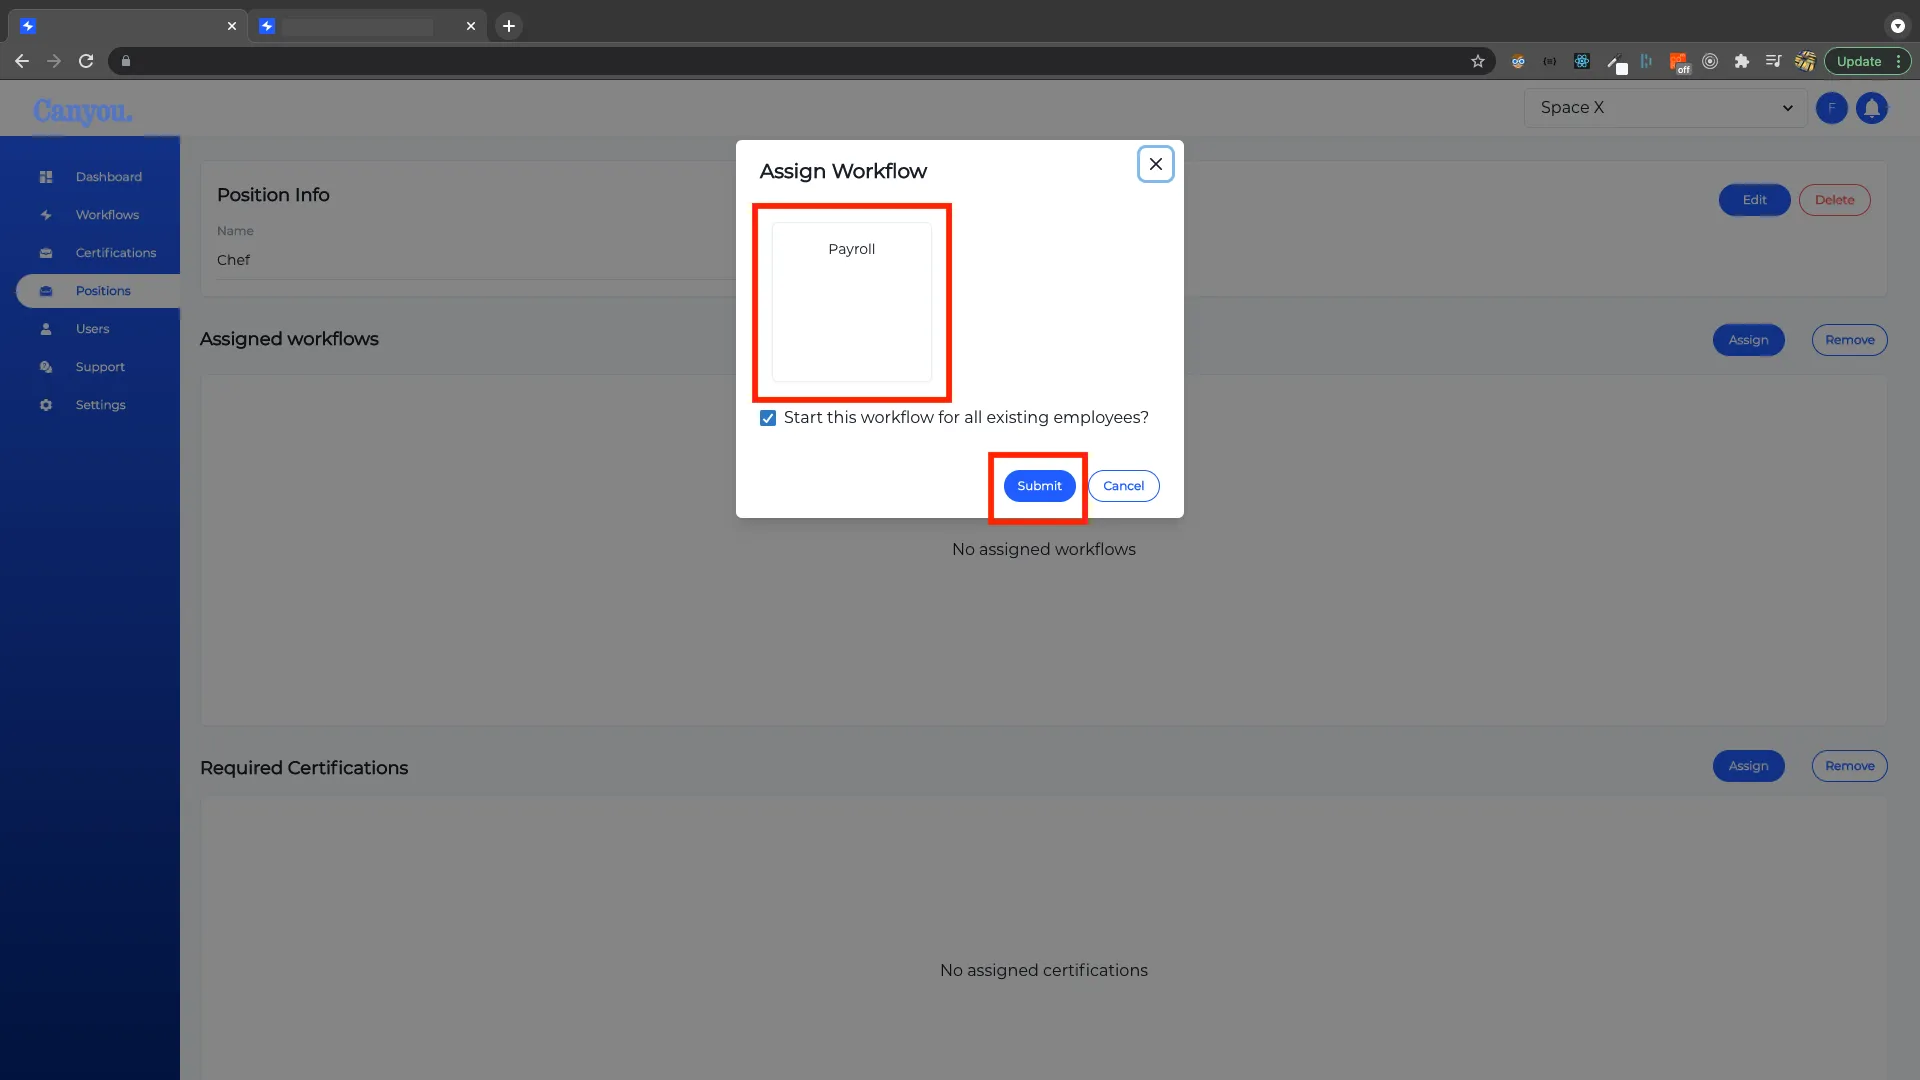
  1. Select the payroll Workflow that we created previously, then click Submit.
screenshot
  1. Great work ๐Ÿ™Œ. We can now see the Workflow has been assigned to the position. Now any new employees that are chefs will have to complete this Workflow. The next step is inviting an employee. Navigate to the user menu and click the next section to invite an employee users.
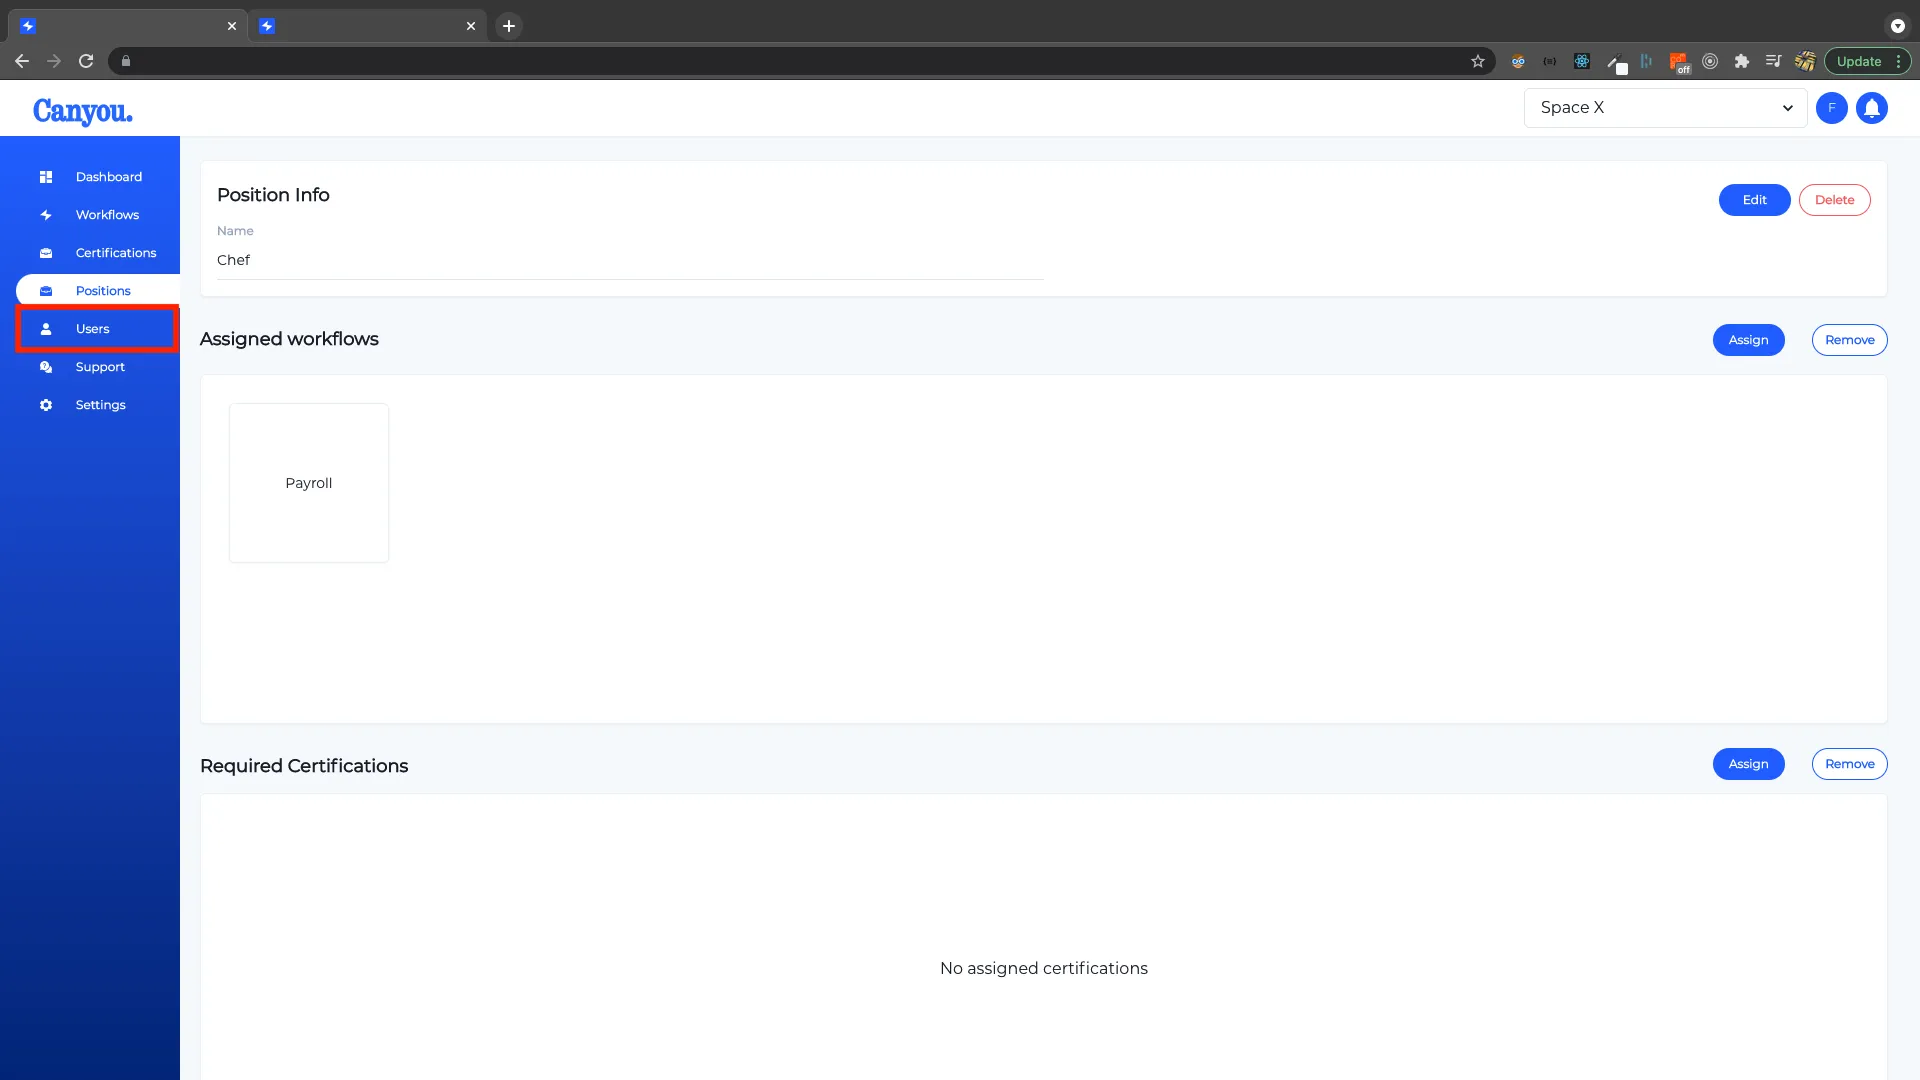
screenshot

Now lets invite our first employee to the platform ๐Ÿ‘ทโ€โ™€๏ธ

NextInvite an employee

30-minute demo ยท video call

See Canyou with your own crew in mind

Pick a time that suits you. Greg from our Australian team will walk you through it and answer your questions.

  • Your onboarding flow, set up for your crew
  • Licence and ticket tracking to expiry
  • Syncing with Xero, MYOB or Deputy
  • Pricing for your team size

No obligation ยท Australian support ๐Ÿ‡ฆ๐Ÿ‡บ

Loading Greg's calendar