Annual Leave in Advance Agreements
Let employees ask to take annual leave before they've accrued it, have them and the business both sign a written agreement, and keep the signed PDF on file.
This guide rebuilds the Fair Work Ombudsman's "Agreement to take annual leave in advance" template in Canyou. The agreement must be signed by both the employee and the employer and say how much leave is being taken in advance and the day it starts. Canyou's e-sign template covers all three, in the right order.
For when leave in advance is allowed, what the agreement must say and what happens if the employee leaves before they've accrued it, see our guide to annual leave in advance.
What you'll use
- An e-sign template with two signers, Employee and Employer, signing in order
- An E-Sign template task in a workflow, so every agreement is created for the right employee
- Self-service workflows so employees can ask whenever they need
- Completion notifications to tell payroll when an agreement is signed
Step 1 - Prepare the PDF
Download the Agreement to take annual leave in advance template from Fair Work. Put it on your letterhead, delete the purple guidance text, and leave the blanks for the employee's name, the amount of leave, the start date and the signatures. Save it as a PDF.
Check your award or registered agreement first. Fair Work's template is for employees whose award or agreement allows leave in advance. For award and agreement-free employees, get advice before you agree.
Step 2 - Create the e-sign template
Go to E-Sign > Templates and click New Template. Click Upload Template, choose your PDF and wait for it to finish converting.
- Document name: Agreement to take annual leave in advance
- Use ordered signing: leave it ticked, so the employee fills in their part first and the employer countersigns after
Set up the two signers:
- Employee - Assigned To stays as Subject, the person who starts the workflow. Instructions, for example: "Enter how much annual leave you'd like to take in advance and the day it starts, then sign. Your employer will countersign."
- Employer - click Add Signer, name it "Employer", remove Subject and choose Admins, a position such as Operations Manager, or a specific member. Instructions, for example: "Check the amount and start date, then sign to agree."
Leave Email completed document to signer ticked on both, so the employee and the countersigner each get a copy of the signed PDF.
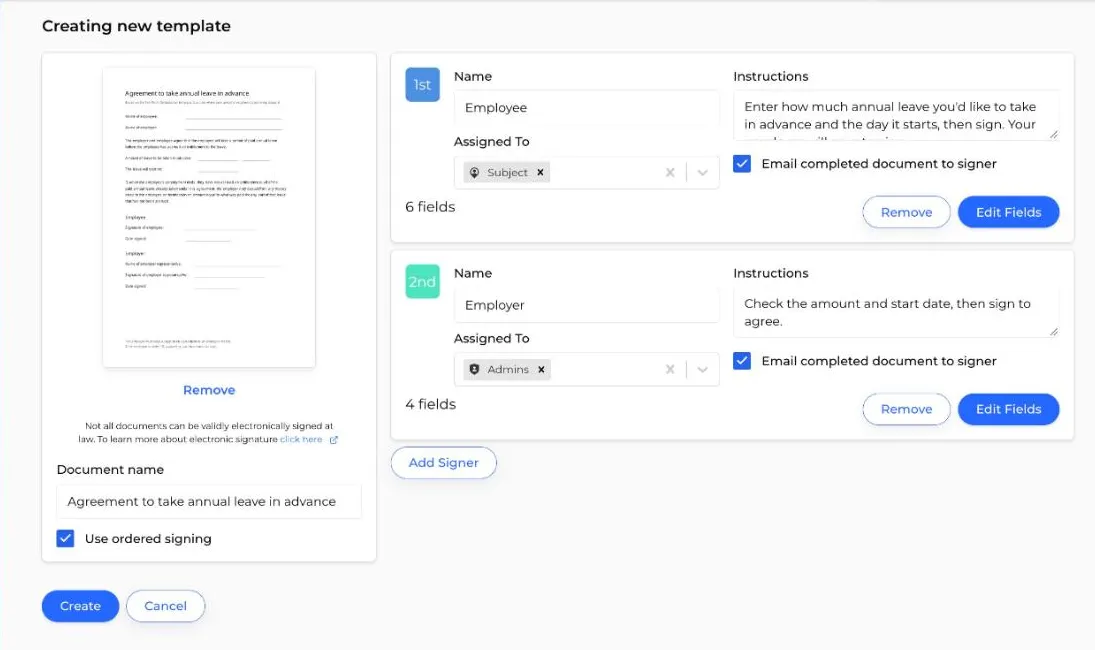
Full guide: Creating an e-sign template
Step 3 - Add the fields
Click Edit Fields on either signer. Choose the signer under 1. Choose a Group, then drag each field onto its line on the PDF.
Employee fields
- Name (prefilled) on "Name of employee"
- Text on the amount of leave. Set Validation to Number.
- Dropdown next to it with the options Hours and Days
- Text on the start date. Set Validation to Date, so it must be written as DD/MM/YYYY.
- Signature and Date signed in the employee section
Employer fields
- Text on "Name of employer". Put your business name in the field's Text setting so it's filled in already.
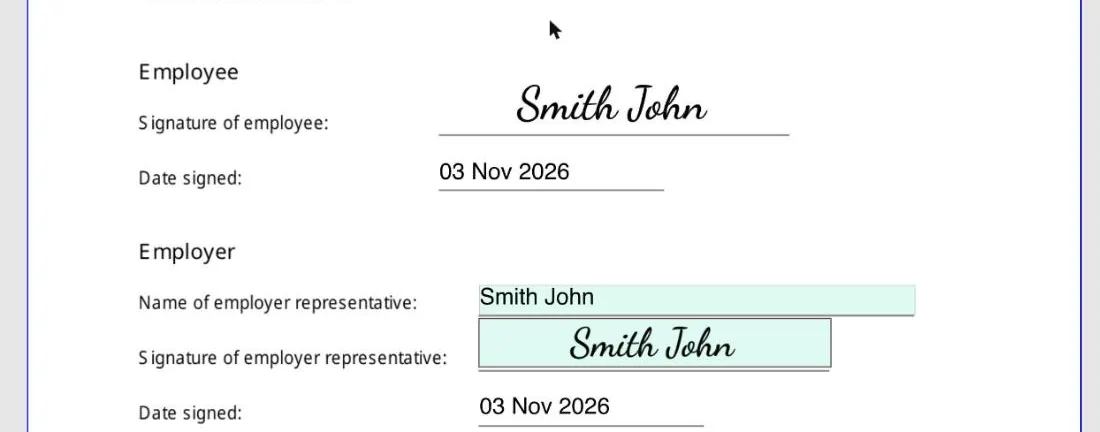
- Name (prefilled) on "Name of employer representative". It fills in the name of whoever countersigns.
- Signature and Date signed in the employer section
Give each field a clear Field name, such as "Amount of leave" or "Leave start date". Signers see it when they hover over the field.
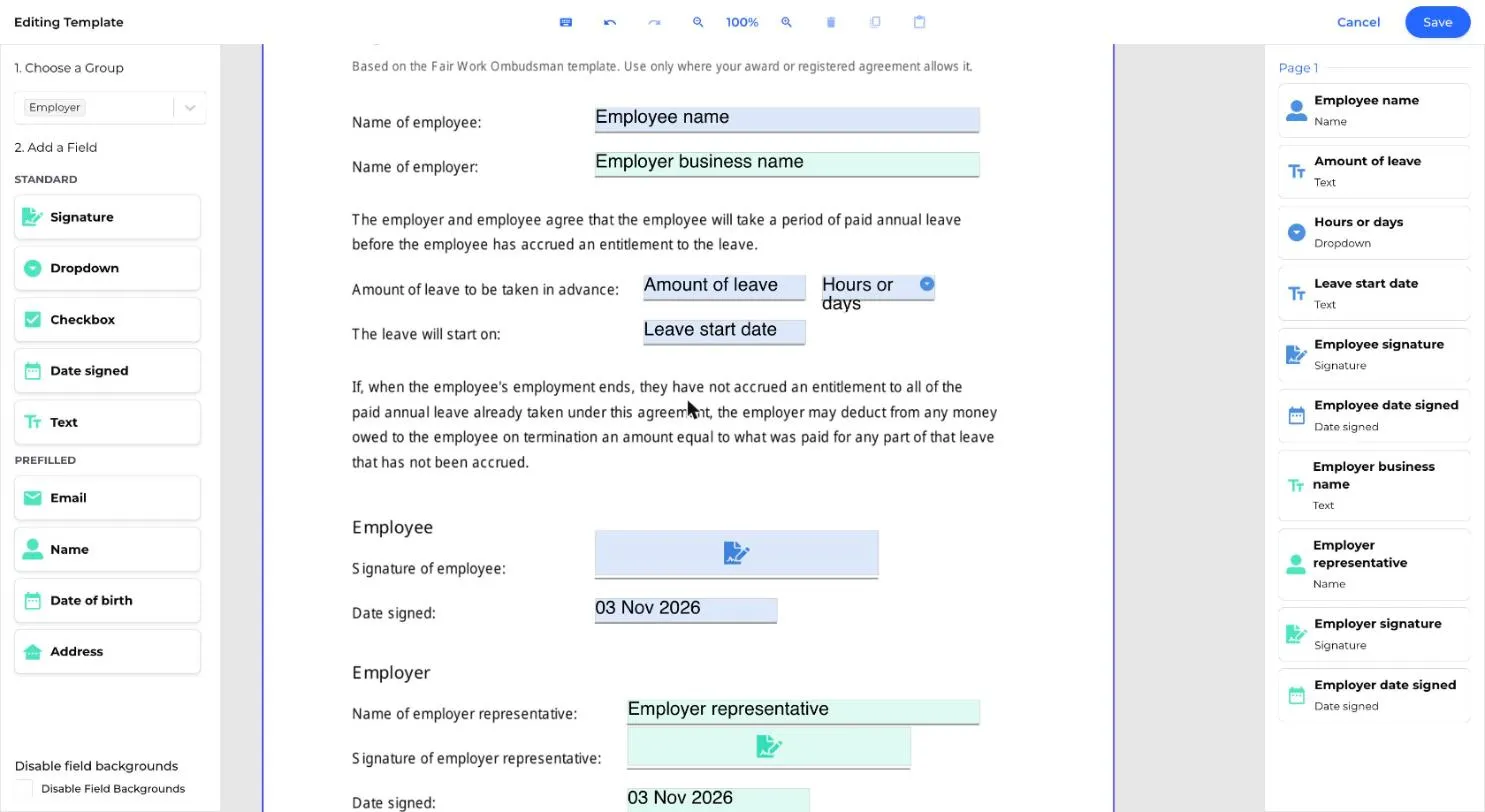
Click Save, then Create. The template appears on the Templates page as v1.
Full guides: Adding fields to a template, Field validation
Step 4 - Add it to a workflow
Go to the Workflows menu, click Create, and name the workflow "Annual leave in advance". Add a short description, for example "Ask to take annual leave before you've accrued it. You and your employer sign a written agreement." Employees see it when they start a workflow.
Rename Step 1 to "Sign the agreement". Click Add task, choose E-Sign template from the Custom section, and select Agreement to take annual leave in advance in the Template dropdown. Canyou shows both signers and their instructions.
Click Save.
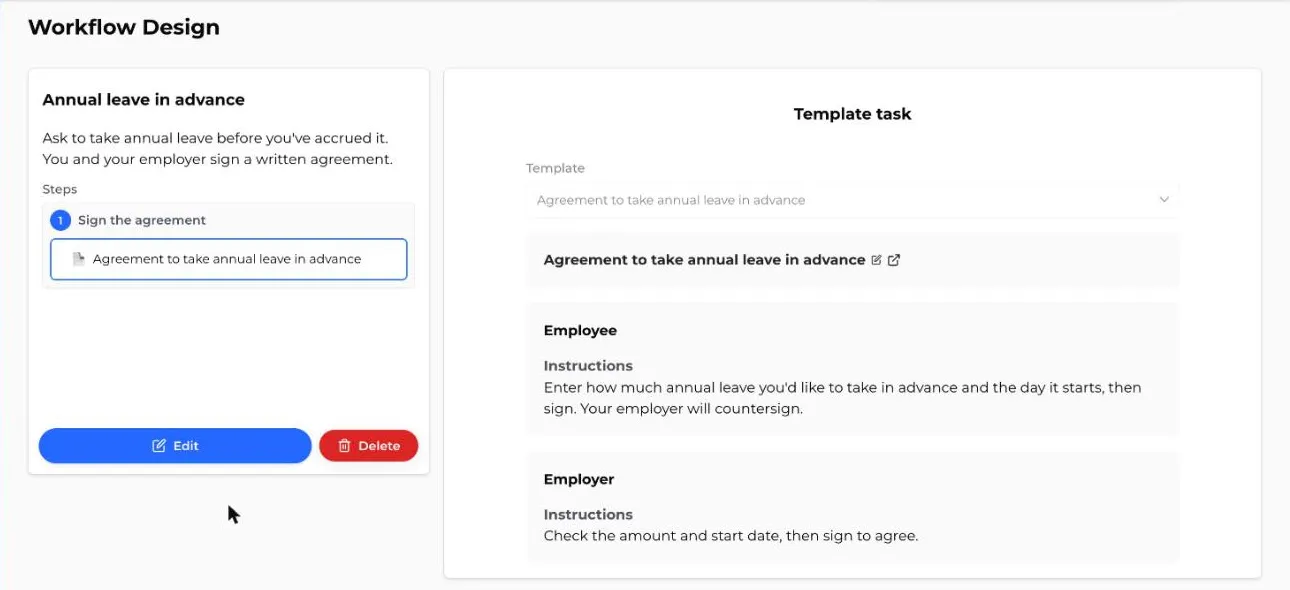
Full guide: Adding an e-sign template to a workflow
Step 5 - Make it self-service
On the Workflows page, open the workflow's 3 dot menu and click Make self-service, then confirm.
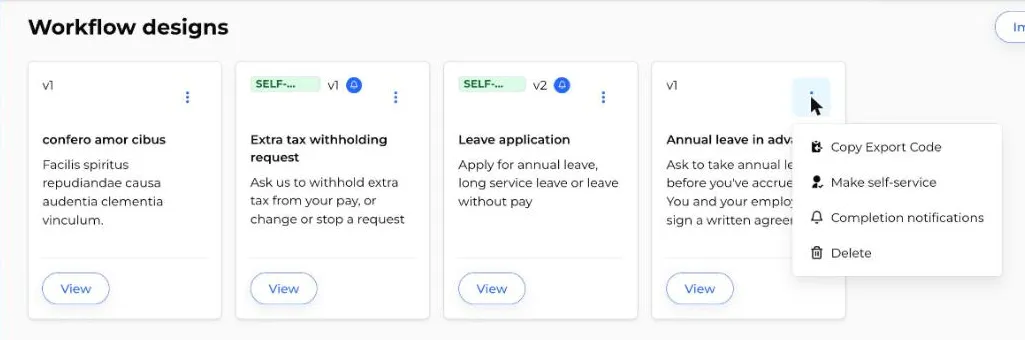
Employees can now click Start workflow on their dashboard and pick Annual leave in advance.
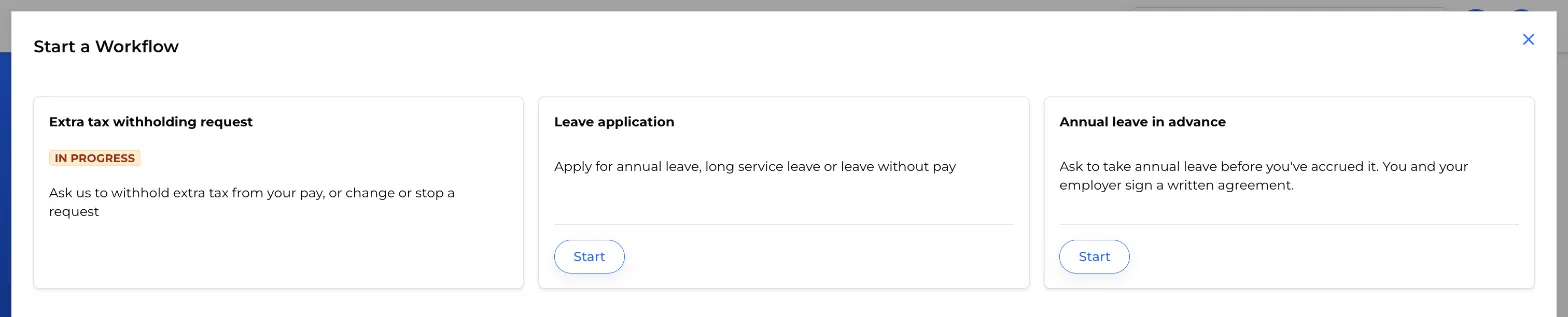
If you'd rather offer leave in advance case by case, skip this step and assign the workflow to the employee from their Workflows tab instead.
Full guides: Create a self service workflow, Start a self service workflow
Step 6 - Notify payroll
Open the workflow's 3 dot menu and select Completion notifications. Toggle Notifications on, add your payroll officer, bookkeeper or the Admins group in the Notify field, and click Save.
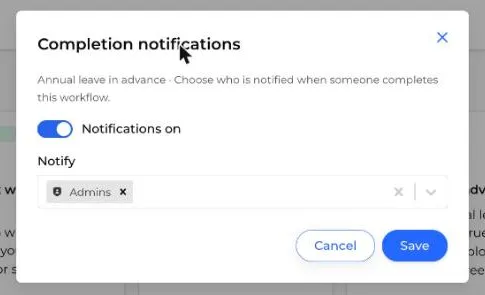
The workflow completes when the employer countersigns, so payroll hears about every signed agreement straight away.
Full guide: Completion notifications
How it works day to day
- The employee asks. They start Annual leave in advance from their dashboard, confirm their details, enter the amount of leave and the start date, sign and click Finish signing.
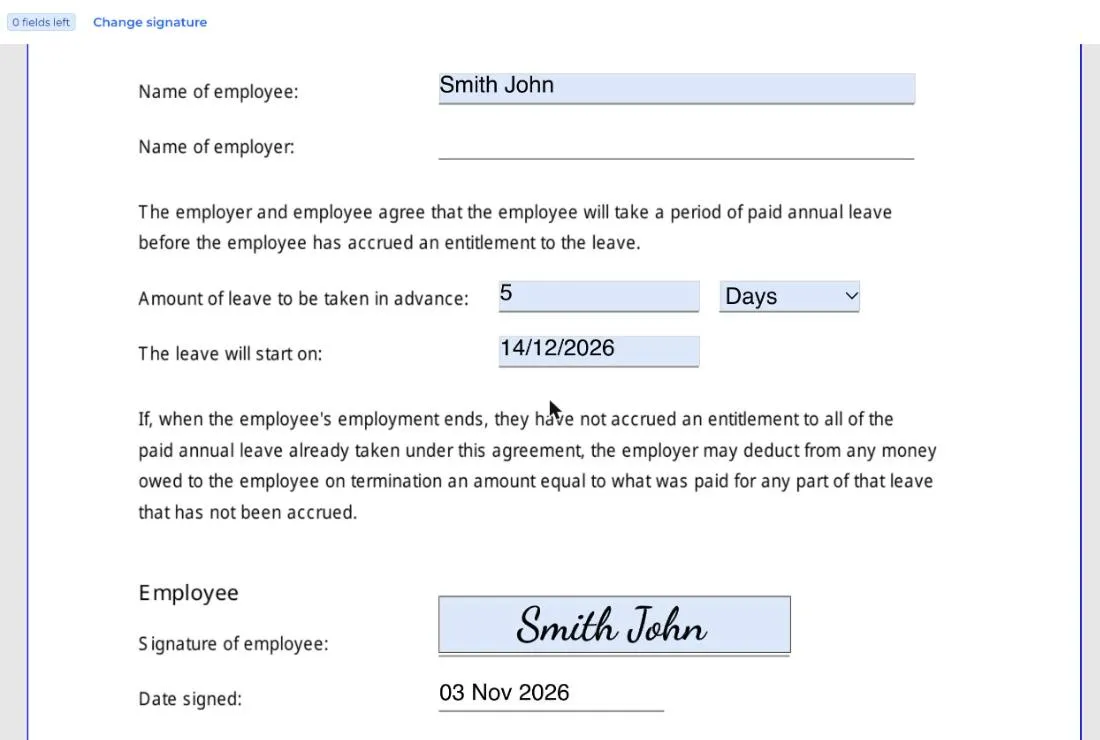
- The employer decides. The agreement appears on the approver's dashboard. They see the employee's answers, locked, add the business name and countersign. If you don't agree to the leave in advance, don't sign. Talk to the employee instead.
-
Everyone gets a copy. Both signers are emailed the signed PDF, and payroll gets the completion notification.
-
Payroll records the leave. Enter the leave in your payroll software, such as Xero, so the employee's balance shows the leave taken in advance. Canyou keeps the signed agreement, but leave balances stay in payroll.
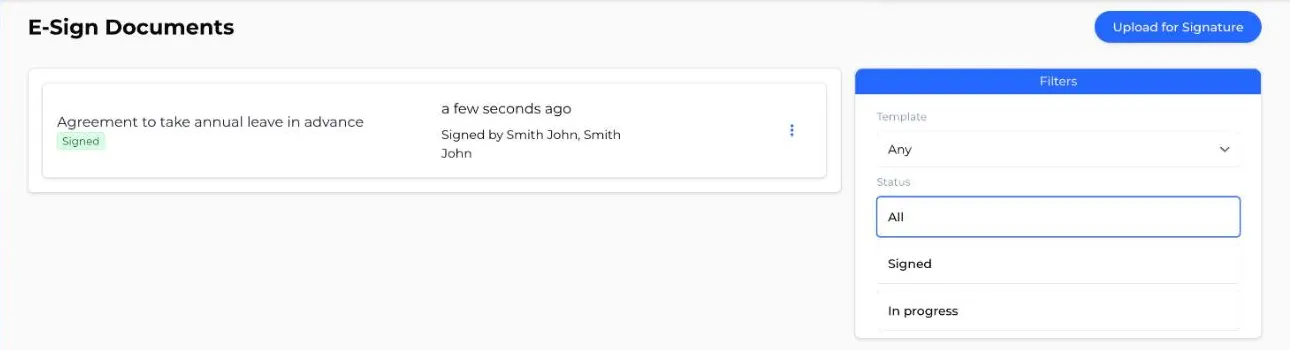
The signed agreement is kept on E-Sign > Documents and against the employee's workflow, with a certificate of completion. That's the copy Fair Work says you must keep as an employee record.
Good to know
- One agreement per period of leave. Each request creates a new document with its own amount and start date. Don't rely on a clause in the employment contract.
- Employees under 18. A parent or guardian must also sign. Make a copy of the template with a third signer, assigned to a specific member, or send it as a one-off document.
- If the employee leaves early. The template includes the deduction wording, so you can recover leave taken in advance that hasn't been accrued from their final pay, where the award or agreement allows it.
- E-sign usage. Each agreement counts as one e-sign document on your plan.
- Changing the template later. Save a new version. Agreements already sent keep the version they started with.